We have enabled many ways to reach out to specific people in your contact lists. Through our Mindbody integration, all of your contacts who have signed in to specific classes and appointments can be targeted individually based on attendance.
Coming soon we will also include enrollments and purchases as categories as well.
For all other integrations, there are the options of using wifi and manual check-ins.
There are many ways to target clients based on Labels (manually adding people through either selection or upload of excel files) or Views (based on specific actions automatically). We will discuss these below.
Labels:
Labels can provide you true targeting if you have special people in mind or even by uploading reports from your current CRM under a designated label.
Creating or Adding to a Label by upload:
When you are going through the upload process as detailed here. You will notice on the first screen the opportunity to create a label or add to a label. You do not need to worry about duplication as the system is designed to have the option to add only missing information if there was an update based on a matching email address or phone number (depending on how you selected to manage duplicates).
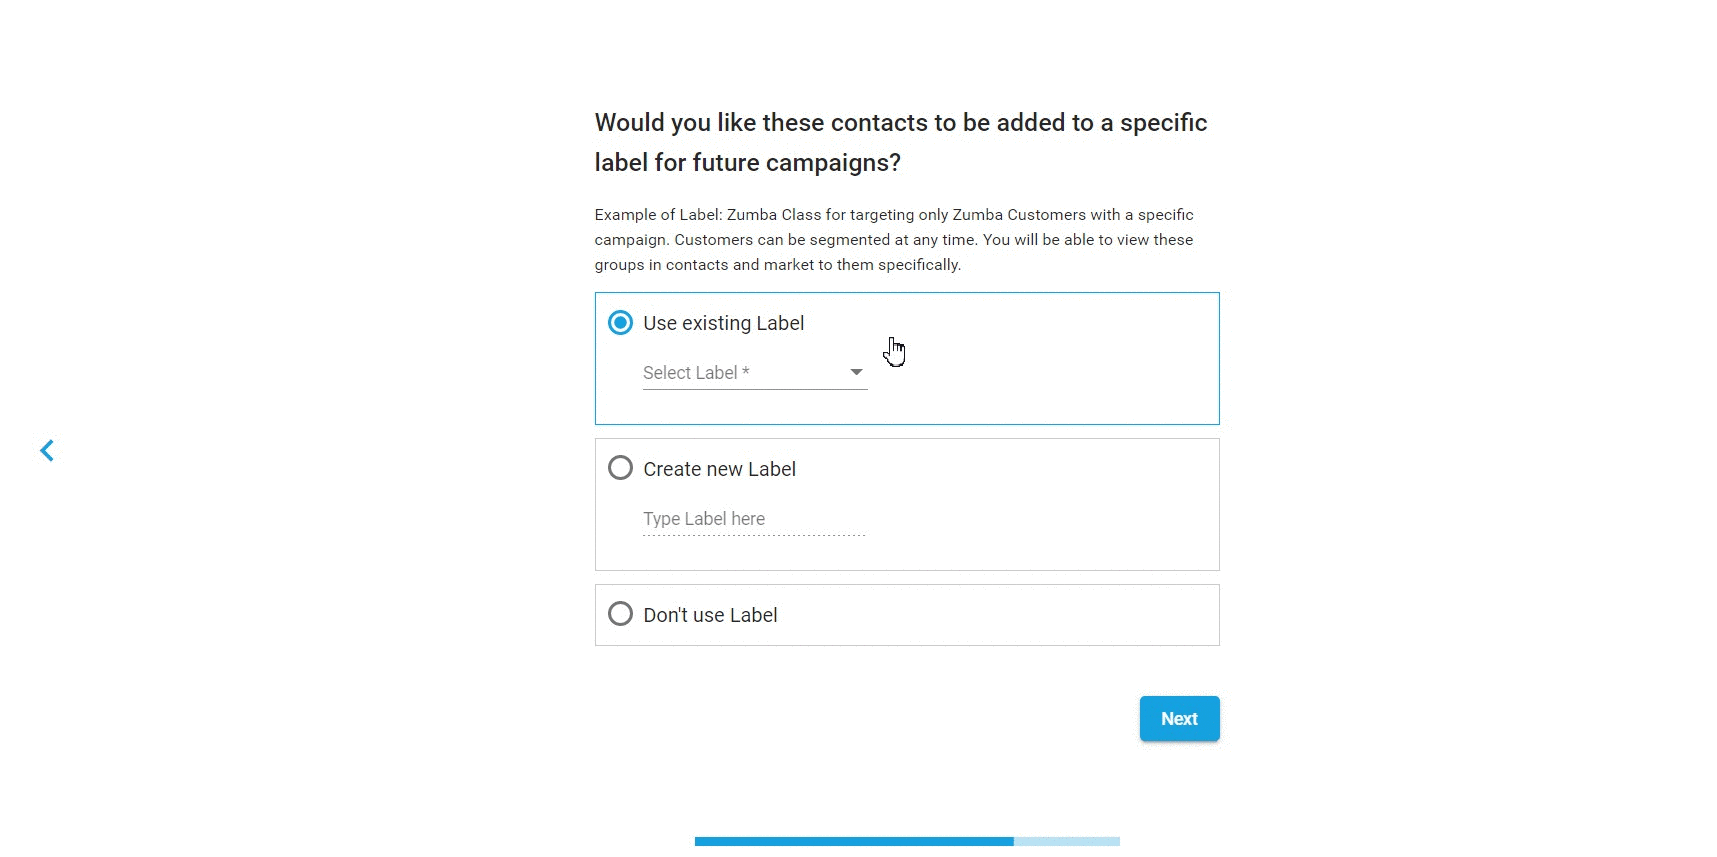
1. Use Existing Label - This will add new contacts found in the sheet to an existing label you have created on the system.
2.Create New Label - This will create a new label/segmentation that you can select in email or text campaigns
3.Don't use Label - Will continue without a label and just mix these contacts into the category you selected.
Creating, adding to, or removing contacts from a Label
Creating a label:
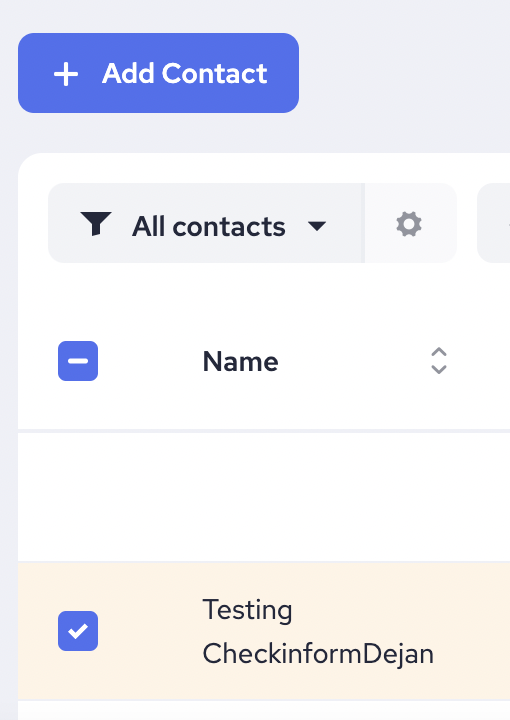
First, on the left-hand side click Contacts.

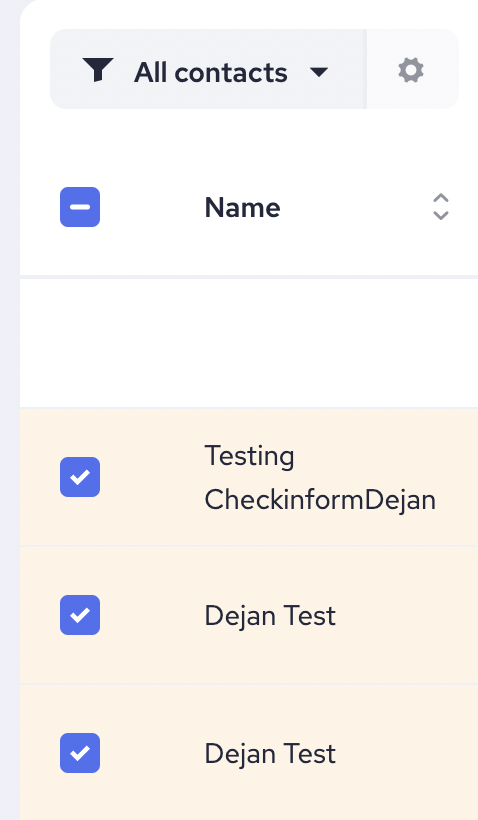
Next, check one of the contacts in your list:
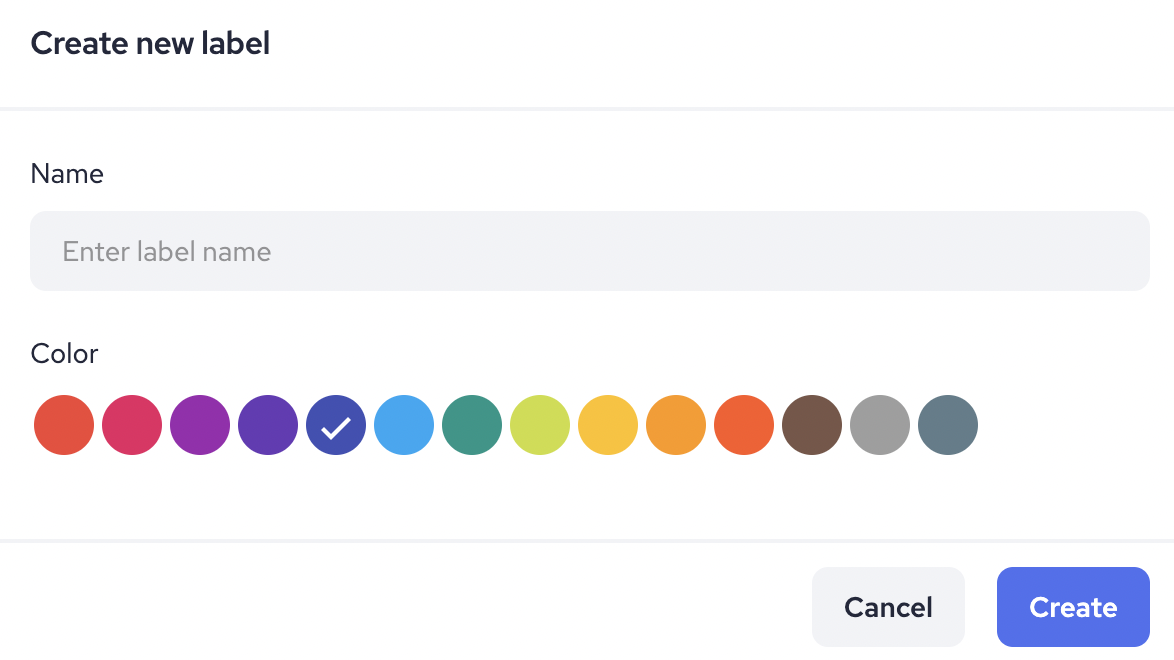
In the pop-up, type in a name for your label and choose a color which will be visible in any contact lists.
Congrats your new label is created! Currently, this label will include just the one person you clicked. To add more than one person at a time, simply follow this same process, but in the first step click multiple names.
Adding contacts to a Label:
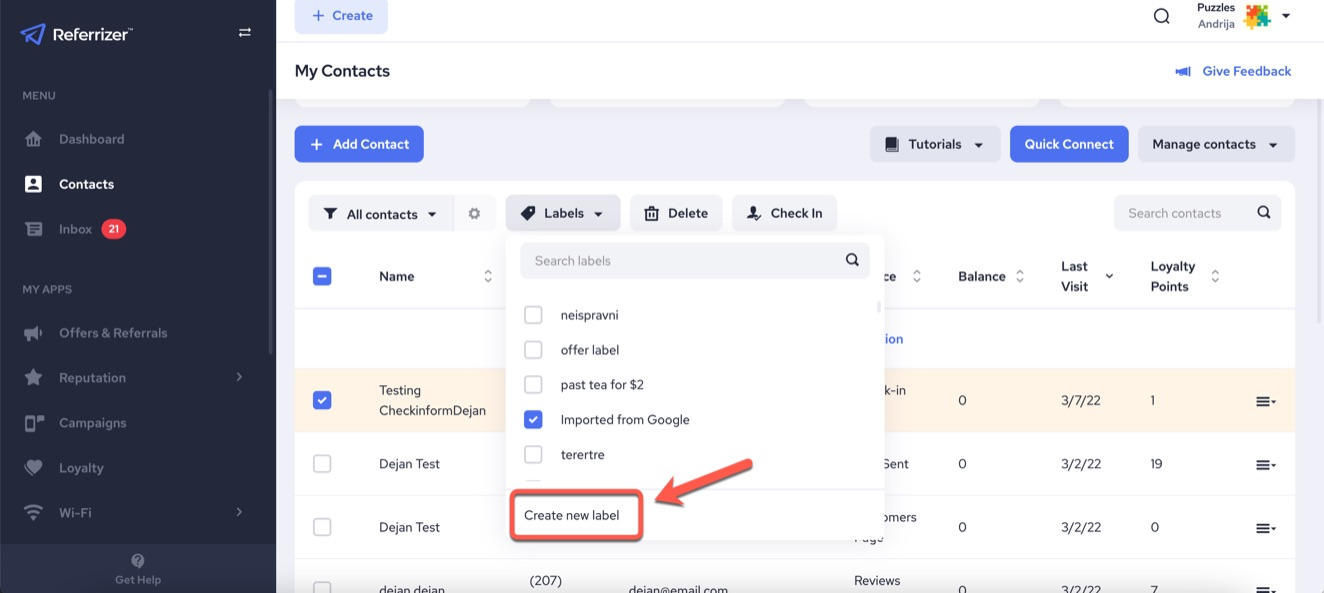
In the Contacts section of your account, first, select the people you would like to add by checking the box next to their name.
Then click on Labels in the top line.
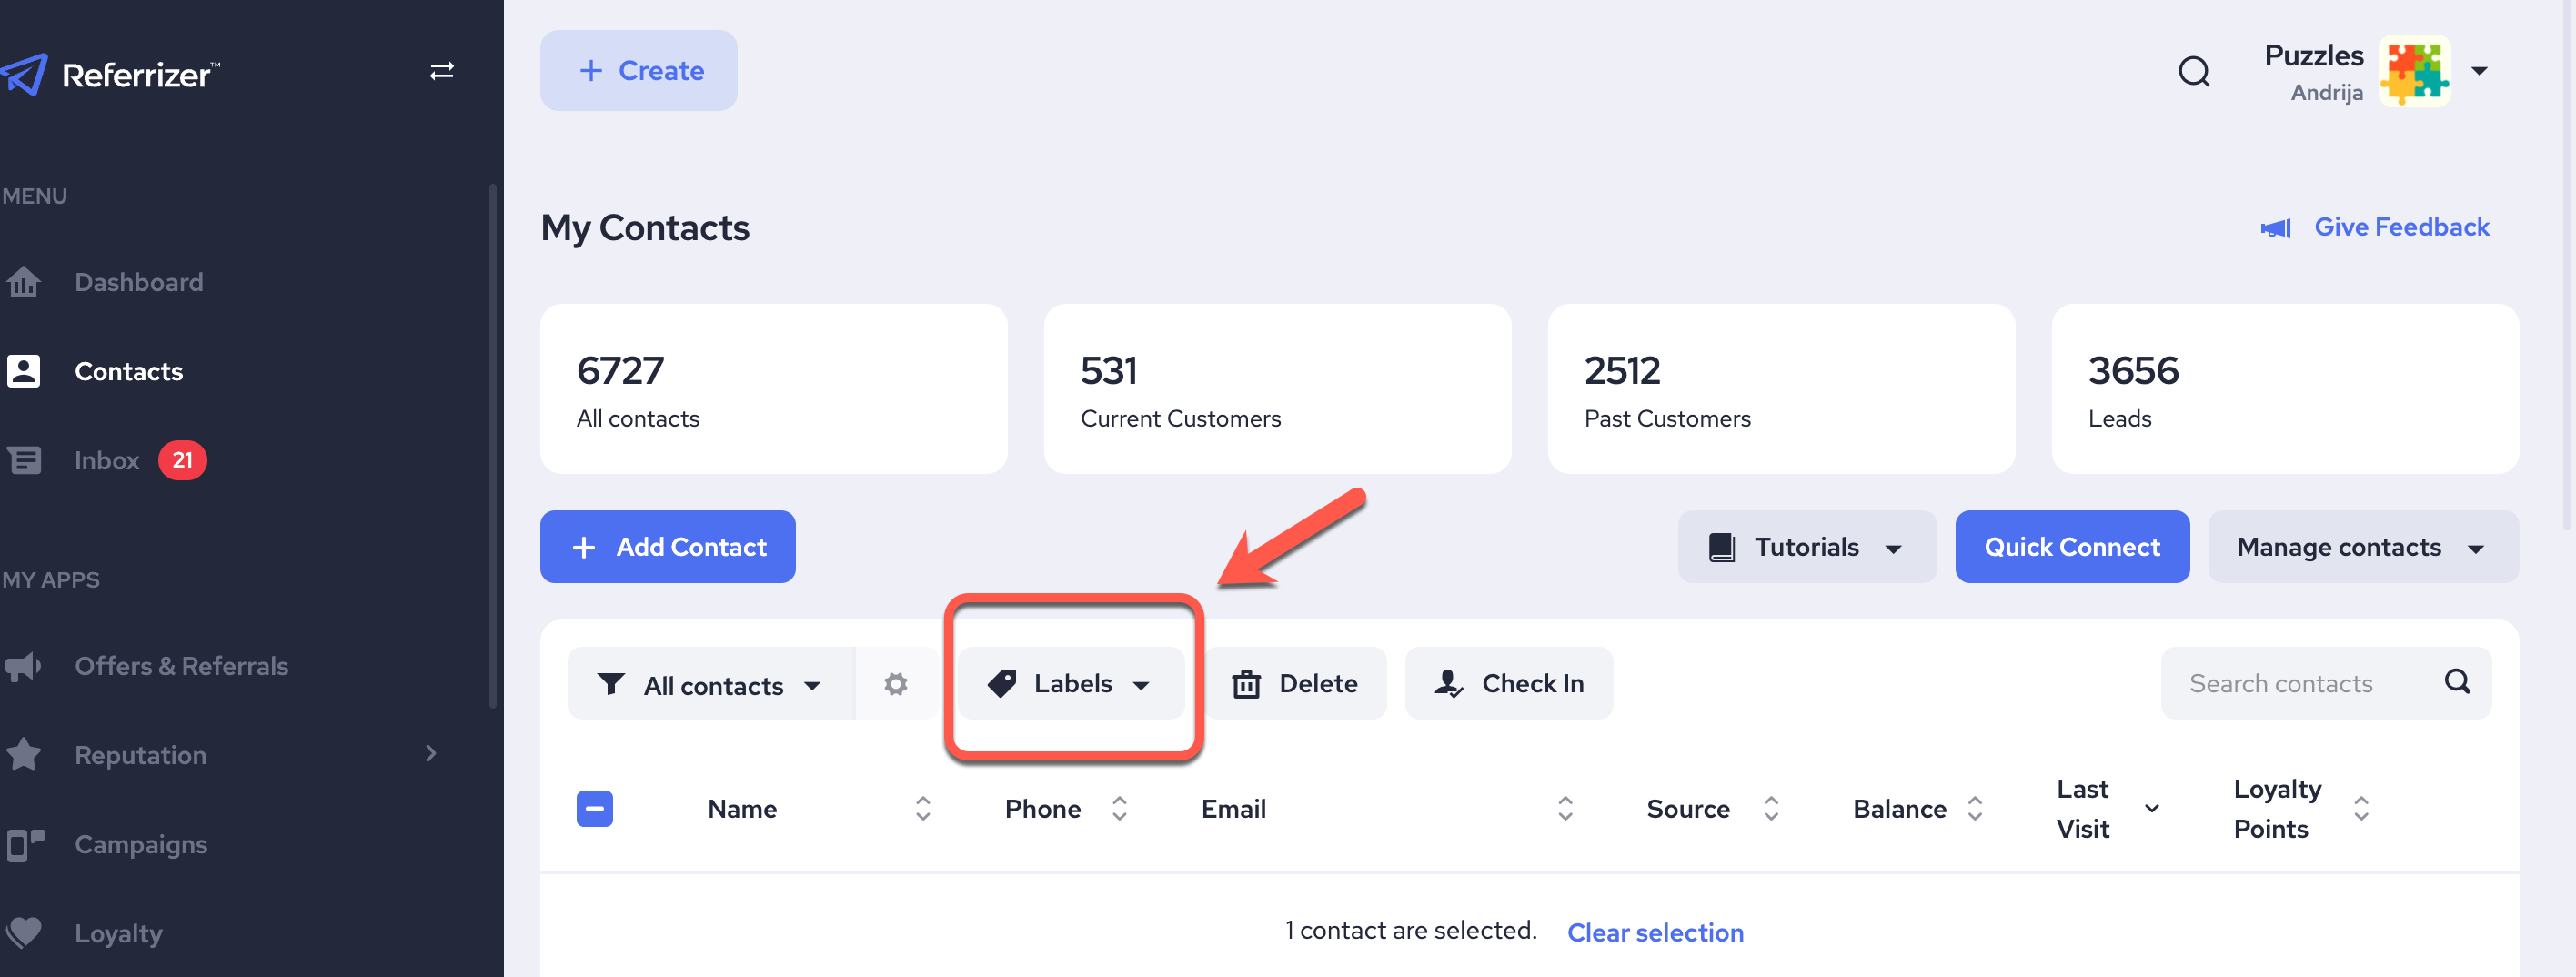
The drop-down list will appear - next just select the label you would like to add them to. They will automatically be added, and you will receive a confirmation flash in the bottom right corner.
Removing contacts from a label:
To remove contacts from a label you can just follow the add a person instructions in reverse.
Select the person you would like to remove from a label.
Then click Labels. The label list will show all labels that this person is associated with, uncheck the label you want to remove them from and you are all set.
Views:
Views are another way to categorize people. Unlike labels, this is a bit more of an automatic process. You are able to determine certain factors that will cause a person to be included in a view. You can use factors such as First Visit within the last 2 weeks which would be setup by creating a new view and using the first visit date as the deciding factor in less than 15 days. There are many options for this and will require your database to be kept current for it to include people correctly.
Creating a new view:
Step 1: Select Create
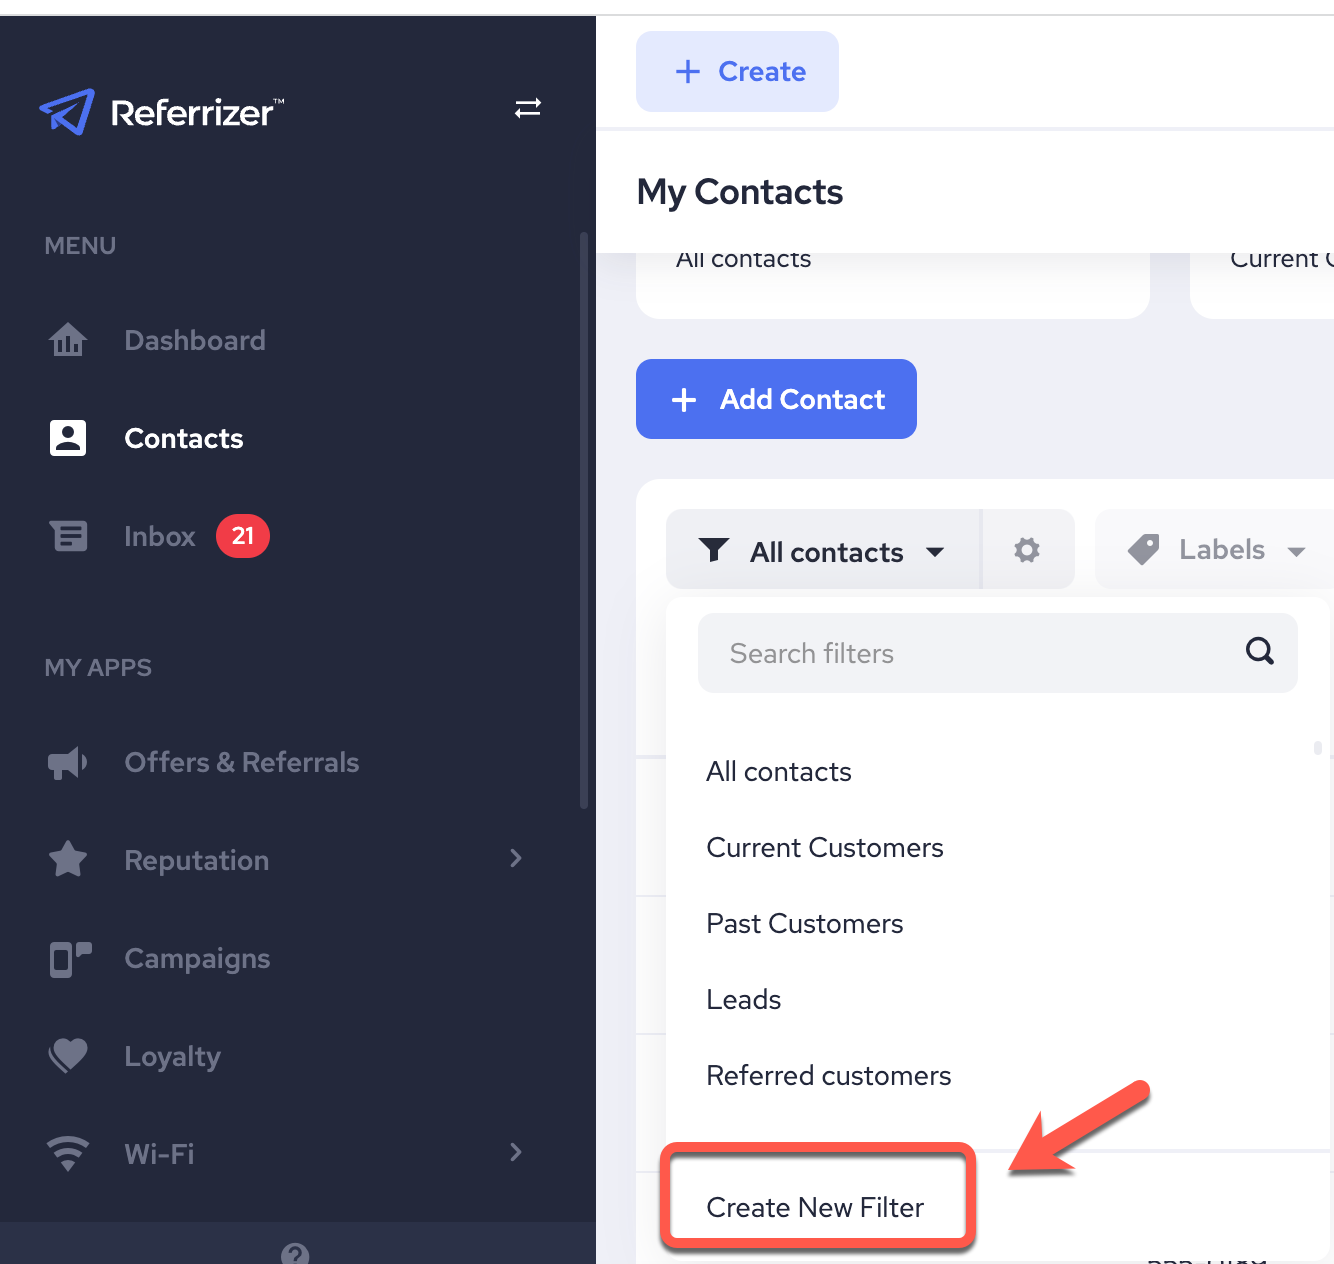
In the Contacts section of your account, first select All Contacts.
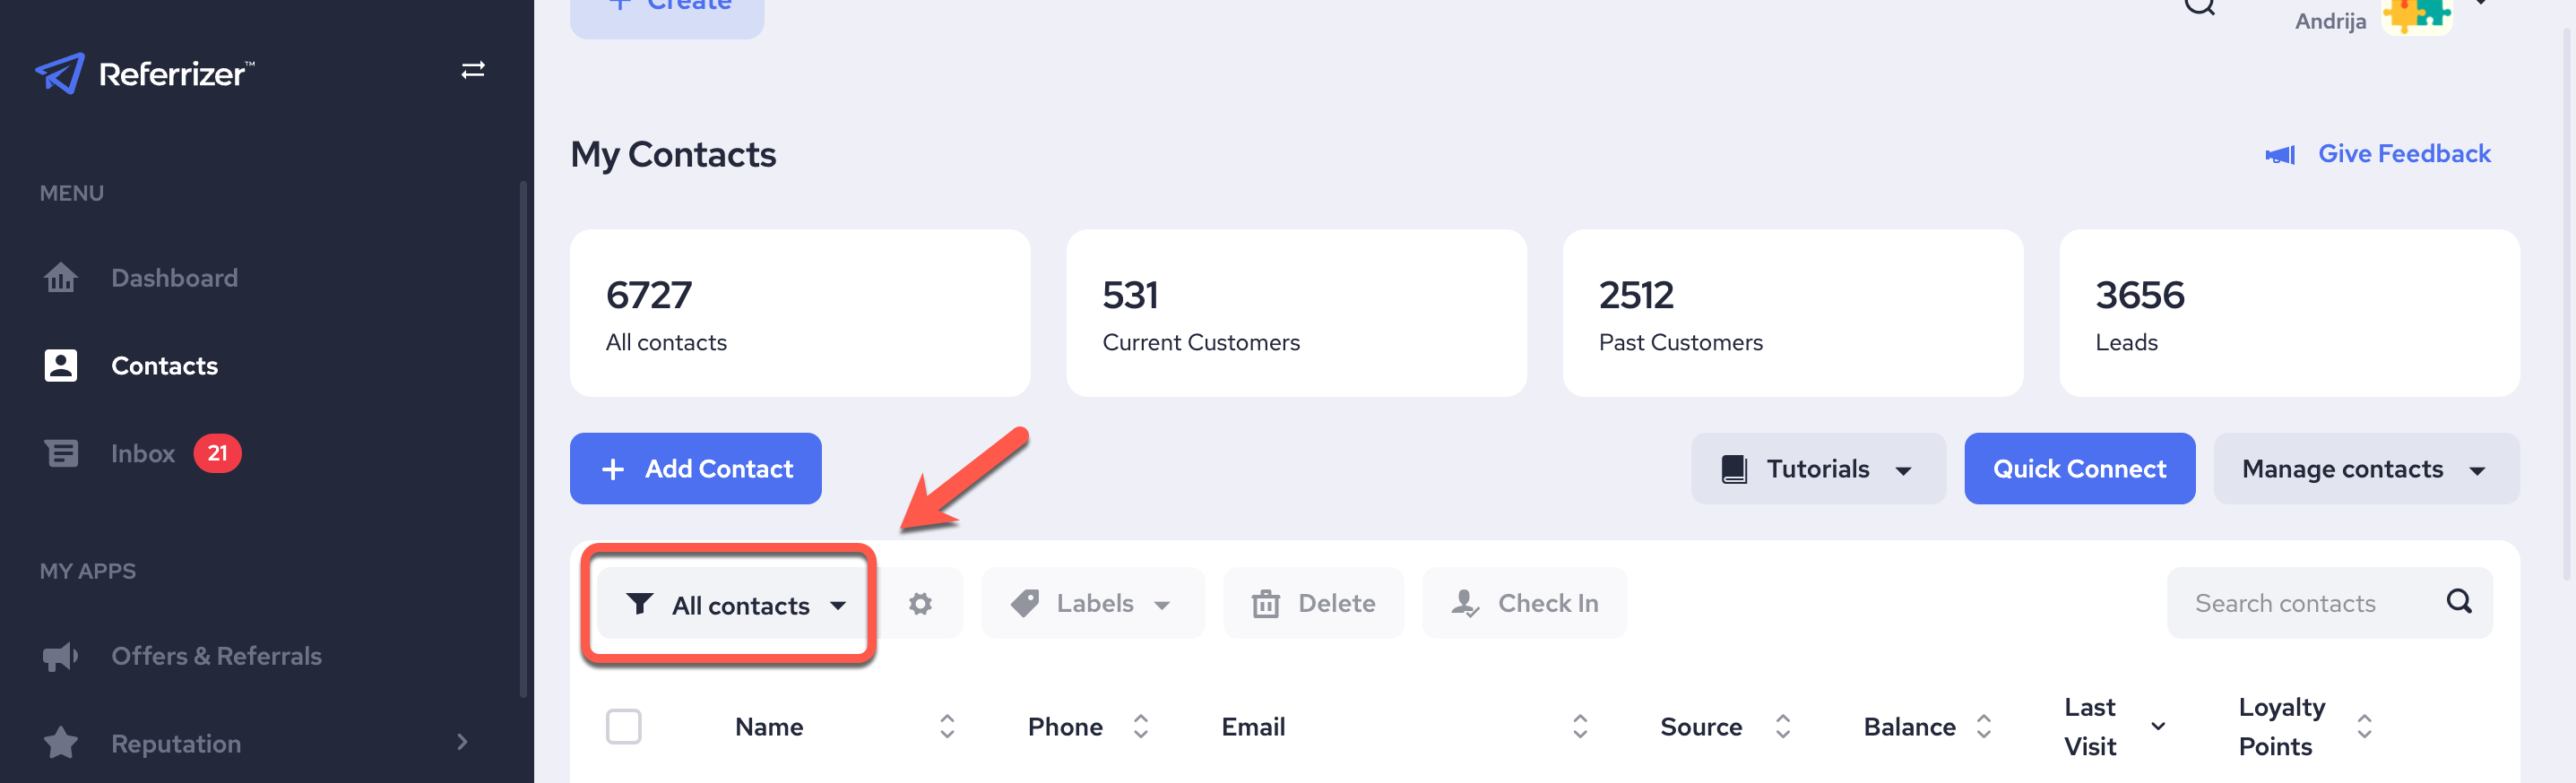
Then the views list will appear. You can think of views as the group you are looking at or working with inside the contacts section. These will be available automatically in any campaigns to use as a one-time group or even a trigger.
Select Create New at the bottom of the list.
This will open a new pop-up.
First type in the name for your view. Then select items from the All Conditions or Any Conditions sections that you want included in your view.
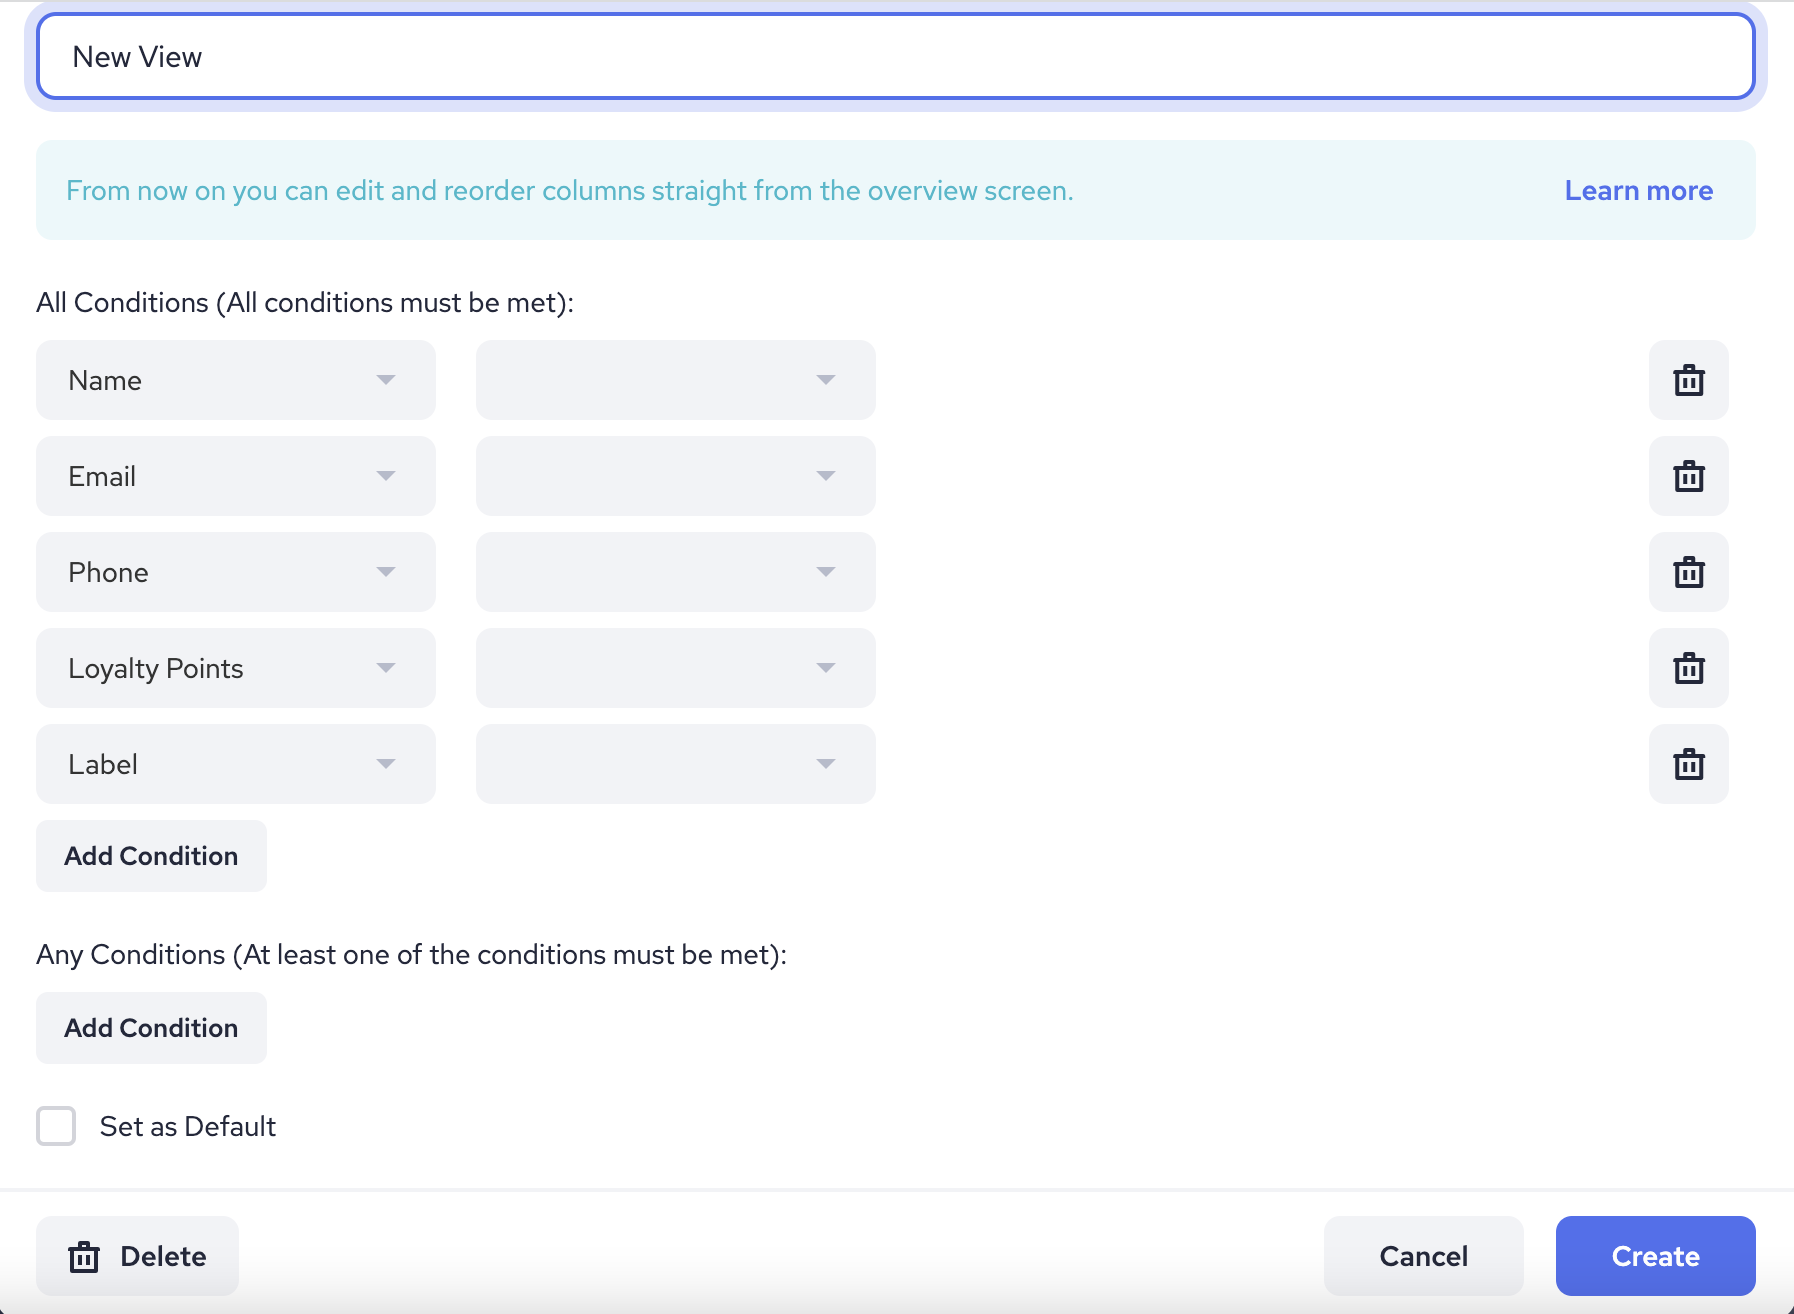
Here's a description of each:
1. View Name - Give your view a unique name so that you are able to locate it later.
2. All Conditions - think of this as the option 'and' the system will verify that all criteria entered here is met. It will not exclude and condition entered in this section.
3. Any Conditions - think of this as the option for 'or' the system will verify at least one of the conditions entered here is met. It can be 1, some or all of these conditions that will include a person in this view.
4. Set as Default - Check if you would like this view to be the primary one when you enter the contacts section. ie the first one shown