Editing existing or adding a new contact status would directly be visible on your Pipeline. All customization functionalities are available on the Contact Settings page. In order to ADD, EDIT, DELETE or REORDER a new status follow the instruction below to set you preferences.
Here you will find instructions on how to reach out to Contact Settings page via the Pipeline.
1. Clicking on the Create New Status button at the bottom of the page will open a pop-up for adding a new contact status.

After entering the new status name, click on Save for saving it, or on Cancel for closing the pop-up and retrieving the taken action.
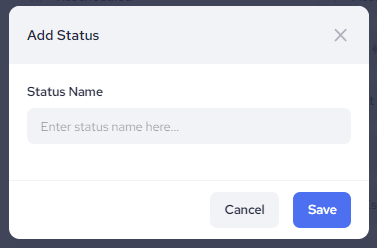
Newly created status will have its own element added to the Contact Settings page accordingly.

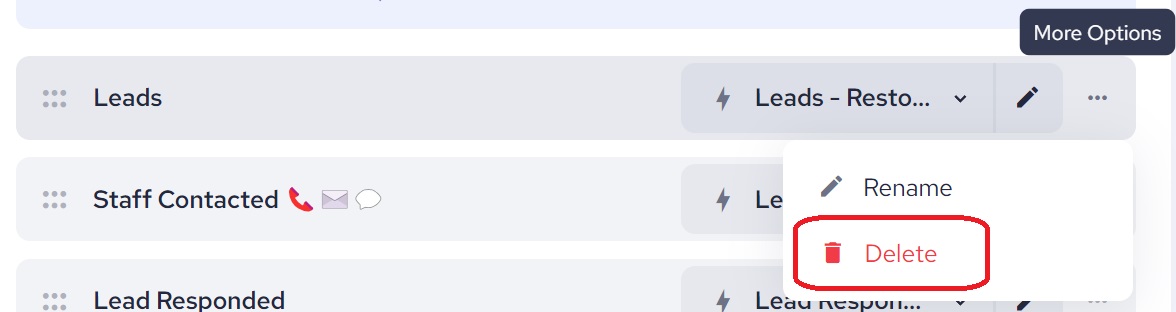
2. Click on More Options button and select Rename for changing the name of the status.
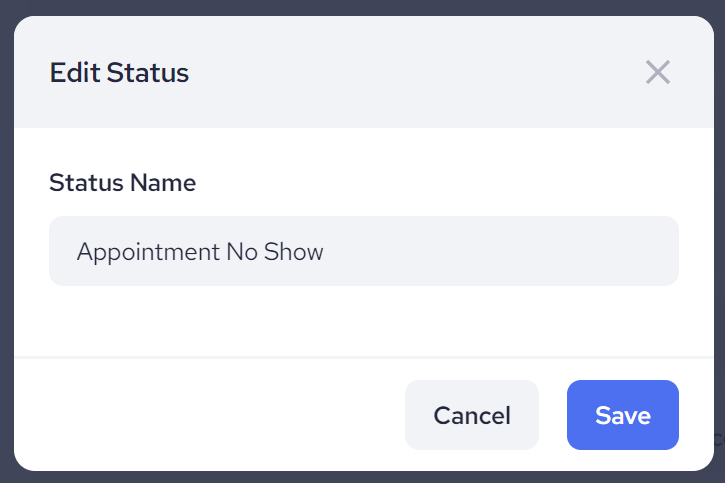
After changing the status name, click on Save for saving it, or on Cancel for closing the pop-up and retrieving the taken action.
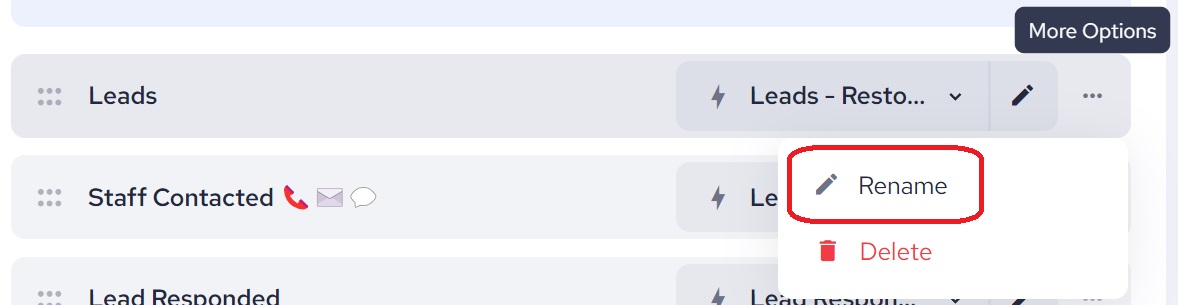
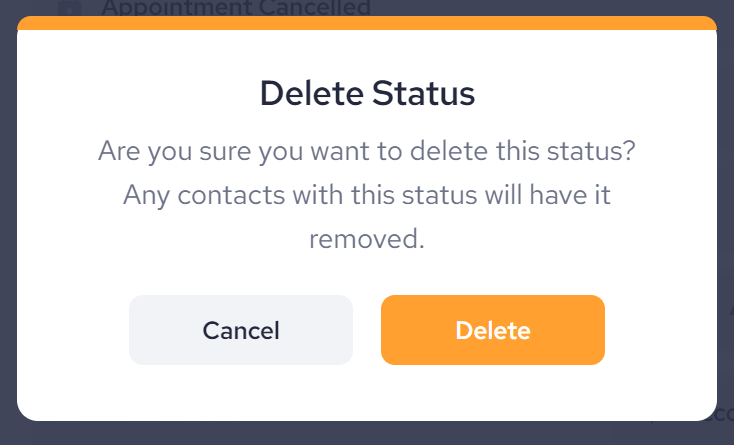
3. Delete option will allow you to delete the status completely. At this point you have to be aware that in this case, after confirming the taken action, all contacts will be moved to "No Status" stage.
Clicking on Cancel pop-up will close and taken action retrieved.
4. Click & Drag button on each individual status element will assist you in reordering your statuses. This change will be applied to your Pipeline view accordingly.

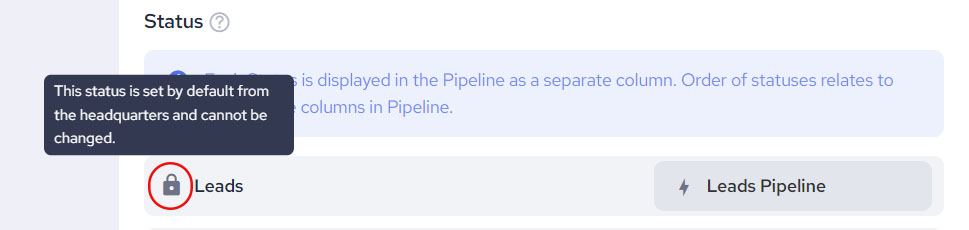
Keep in mind that all statuses created by Headquarters accounts can not be edited from other than that account. However, all functionalities mentioned above are available for statuses you did create in additions to HQs'