Setting up email authentication for your custom domain is crucial to ensure that your emails reliably reach your recipients' inboxes and maintain a low bounce rate. Email authentication not only enhances the security of your communication but also helps you foster and grow an engaged audience. The essential step in ensuring proper functionality, security, and email authentication is adding DNS records to a website.
We recommend accessing your domain records prior to initiating the authentication process. To do so, please log in to your domain provider's or web host's website, or utilize website management software such as cPanel, Plesk, or WHM.
If you are unsure about where your domain is managed, kindly contact the individual or team responsible for managing your website or email address for assistance.
Follow the steps below to add DNS records to your domain’s settings.
Step 1: Access your DKIM page in your Referrizer account
You may access the page via banners placed on a few different spots or from the Settings page
Step 2: Access Your DNS Management Dashboard
To add DNS records to your website, you'll need to access your DNS management dashboard. This is typically provided by your domain registrar or hosting provider (see the list of the most common domain providers at the bottom of this article). Log in to your account and look for a section related to DNS settings or DNS management.
Step 3: Locate the DNS Records Section
Within your DNS management dashboard, you should find an option to manage DNS records. It may be called "DNS settings," "DNS management," "DNS records," or something similar. Click on it to proceed.
Step 4: Understand the Different DNS Record Types
DNS records come in various types, each serving a specific purpose. The most common types include:
- A Record: Maps a domain to an IPv4 address.
- AAAA Record: Maps a domain to an IPv6 address (for websites using IPv6).
- CNAME Record: Redirects one domain or subdomain to another.
- MX Record: Specifies the mail server responsible for receiving email.
- TXT Record: Stores text information, often used for verification and authentication.
In your case, you will be adding CNAME and TXT records used for email authentication.
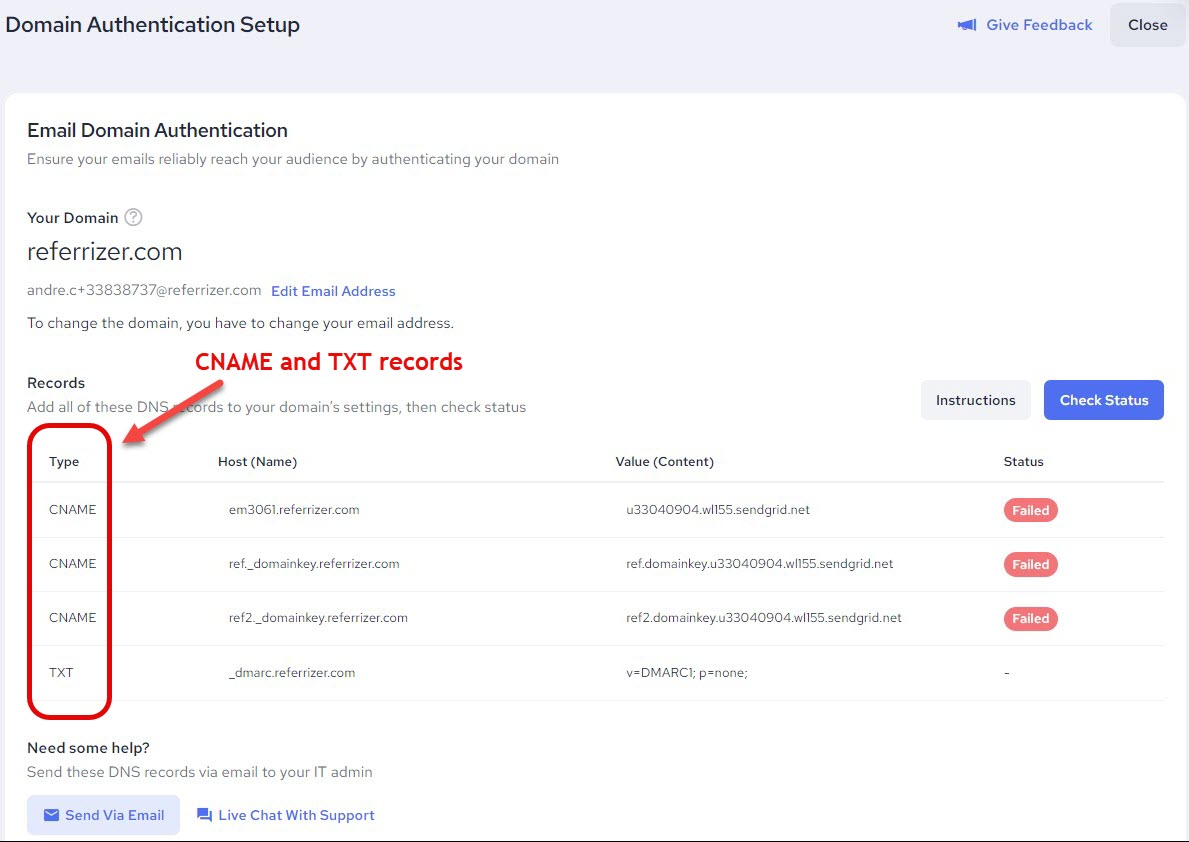
Step 5: Add the DKIM Records
Once you've located the option to add DNS records, select the "TXT" record type and follow these steps:
- Host (Name): Enter the name or host specified on your Referrizer DKIM page. This is often in the format of a subdomain like "dkim._domainkey" followed by your domain name.
- Value (Content): Copy and paste the DKIM record provided on your Referrizer DKIM page into this field.
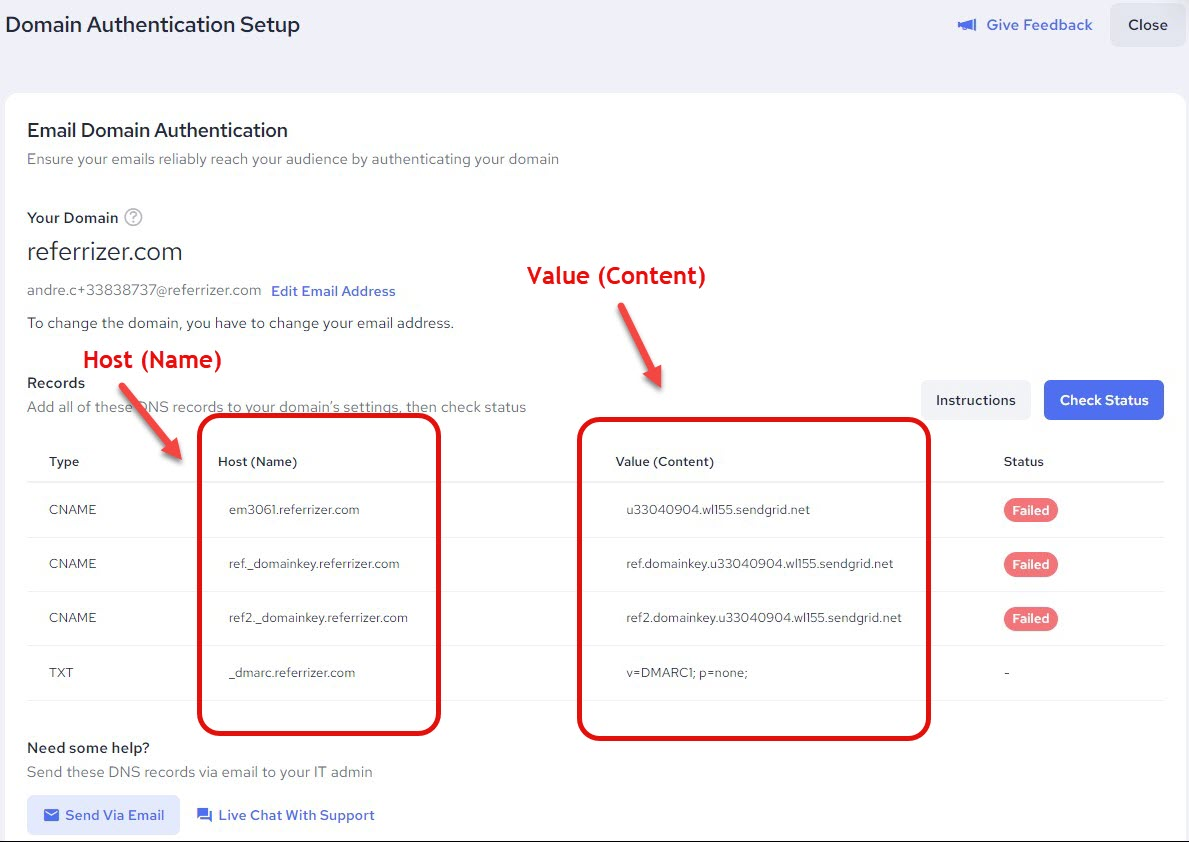
- TTL (Time to Live): This determines how long the DNS record will be cached by DNS servers. You can leave it as the default value or set it according to your preferences.
The pop-up for managing all mentioned elements may look like this one (depending on your domain host):
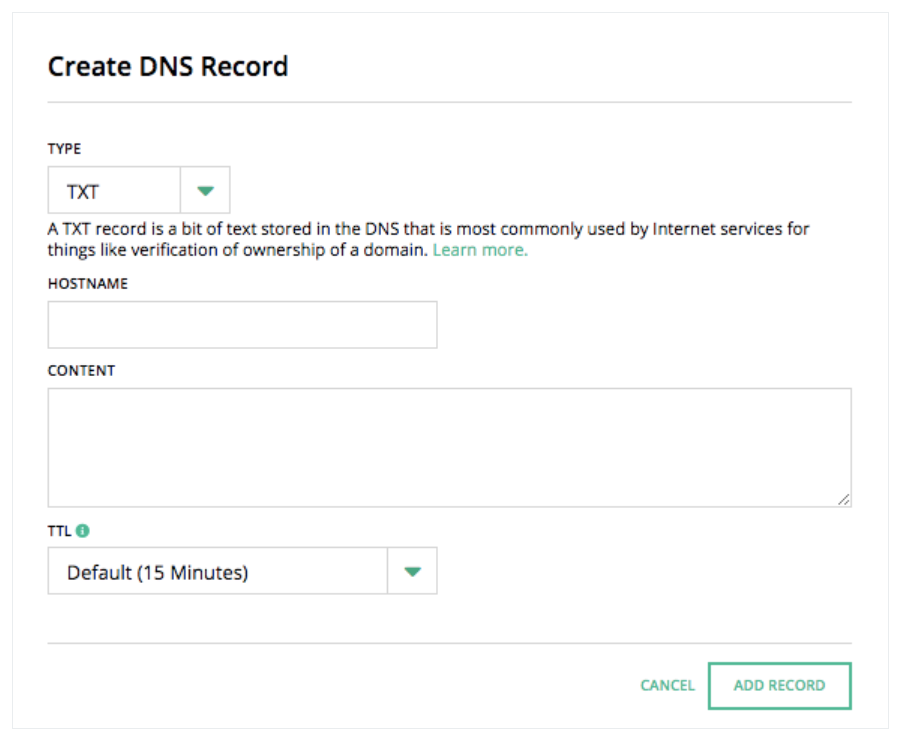
Note: On your Referrizer DKIM page you will get generated four DNS records. Repeat step 5 for adding each record individually.
Step 6: Save Your Changes
After entering the DKIM record details, save your changes. This action may be labeled as "Save," "Update," or "Add Record" depending on your DNS management dashboard.
Step 7: Verify DNS Record Propagation
DNS record changes may take some time to propagate across the internet. It can range from a few minutes to several hours. You can use online DNS lookup tools to check if the DKIM record has propagated successfully. Simply enter your domain and look for the newly added DKIM record.
Step 8: Test DKIM Configuration
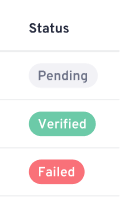
Once the DNS records have propagated, it's essential to test the DKIM configuration to ensure it's working correctly. Coming back to your Referrizer DKIM page you should click on 'Check Status' blue button.
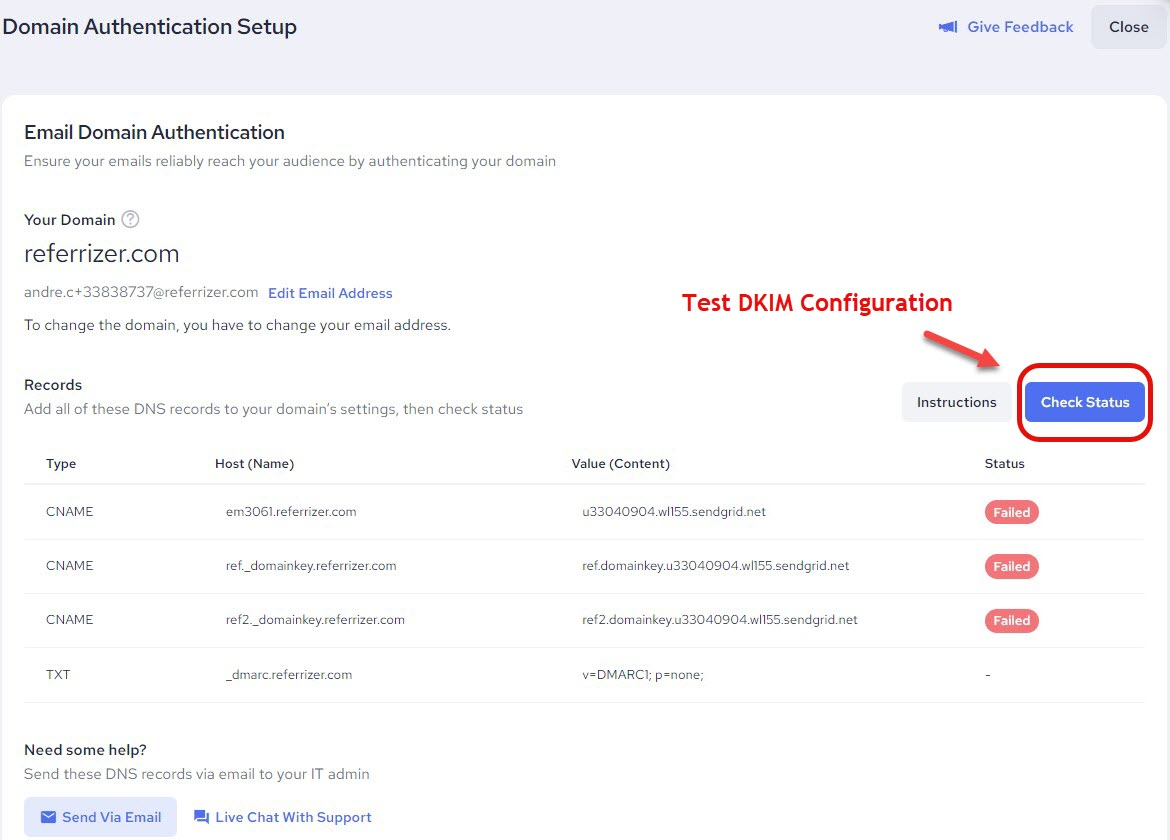
In order to have the process successfully completed all three required TXT records should have the status 'Verified'.
List of common domain providers with instructions for setting up your DKIM:
- Amazon Web Services: Configuring DNS, Resource Record Types
- Bluehost Bluerock/Legacy: DNS Managements
- Dreamhost: DNS Overview
- Dynadot: What is DNS?, How do I set up DNS for my domain?
- GoDaddy: Add a CNAME Record
- Google Domains: DNS Basics
- Hostgator: Manage DNS records
- Hostinger: How to Manage the DNS Zone on Rumahweb
- Hover: Edit DNS Record
- IONOS: Configuring CNAME Records
- Namecheap: SPF & DKIM
- NameSilo: DNS Manager
- Porkbun: What is DNS?
- Squarespace: Advanced DNS Settings
- Stablehost: What are your nameservers (DNS)?
- Siteground: How to manage your DNS records
- Wordpress: Manage Your DNS Records
- Wix: Adding or updating CNAME Records