
The first time you open your AI Assistant, a guided setup walks you through every rule it follows: when it works, who it talks to, and who gets alerted when it needs help. It takes about 2 minutes, and your AI always launches in Test Mode, so nothing reaches a customer until you approve it.
This article walks through each screen of the setup, what every option means, and what happens after you launch.
Before you start
- Setup has an intro screen followed by 7 steps. A progress bar at the top shows where you are (for example, Step 3 of 7).
- Your progress is saved as a draft as you go. At the bottom of every step you’ll see: “Progress is saved as a draft · nothing goes live until you launch.”
- Use Back to return to any previous step, or Skip for now (top right) to leave setup and go straight to AI Assistant Settings.
- Every choice you make here can be changed later in AI Assistant Settings.
Meet your AI teammate (intro screen)
Before any settings, you’ll meet your new AI teammate and see what it can take off your team’s plate.
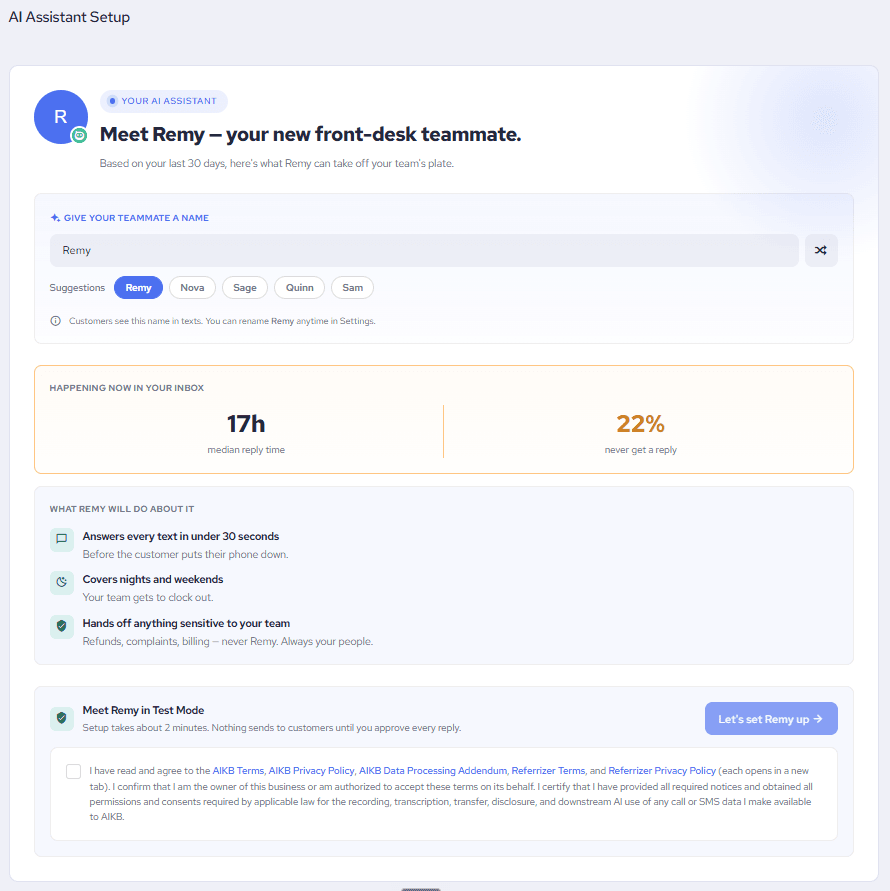
1. Give your teammate a name
Your AI comes with a suggested name, Remy. You can keep it, type your own, click one of the suggested names (Remy, Nova, Sage, Quinn, Sam), or click the shuffle button for a random one.
Good to know: customers see this name in texts. You can rename your assistant anytime in Settings.
2. Review what’s happening in your inbox
If your account has at least 30 days of Inbox history, you’ll see your own numbers under Happening now in your inbox:
- Median reply time: how long a customer typically waits for a first reply from your team.
- Never get a reply: the share of customer texts that are never answered.
New accounts see typical front-desk numbers instead. Below the numbers, you’ll see what your AI will do about it: answer texts in under 30 seconds, cover nights and weekends, and hand anything sensitive (refunds, complaints, billing) to your team.
3. Accept the terms and start
At the bottom of the screen, check the box confirming you have read and agree to the AIKB Terms, AIKB Privacy Policy, AIKB Data Processing Addendum, Referrizer Terms, and Referrizer Privacy Policy (each opens in a new tab). By checking it, you also confirm that you are the owner of the business or are authorized to accept these terms on its behalf.
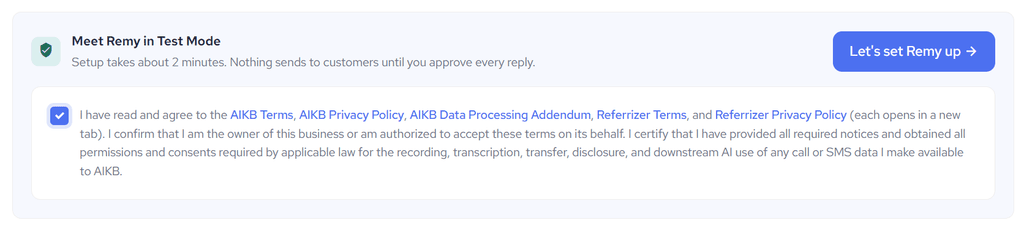
The Let’s set Remy up button stays disabled until the box is checked. Click it to begin.
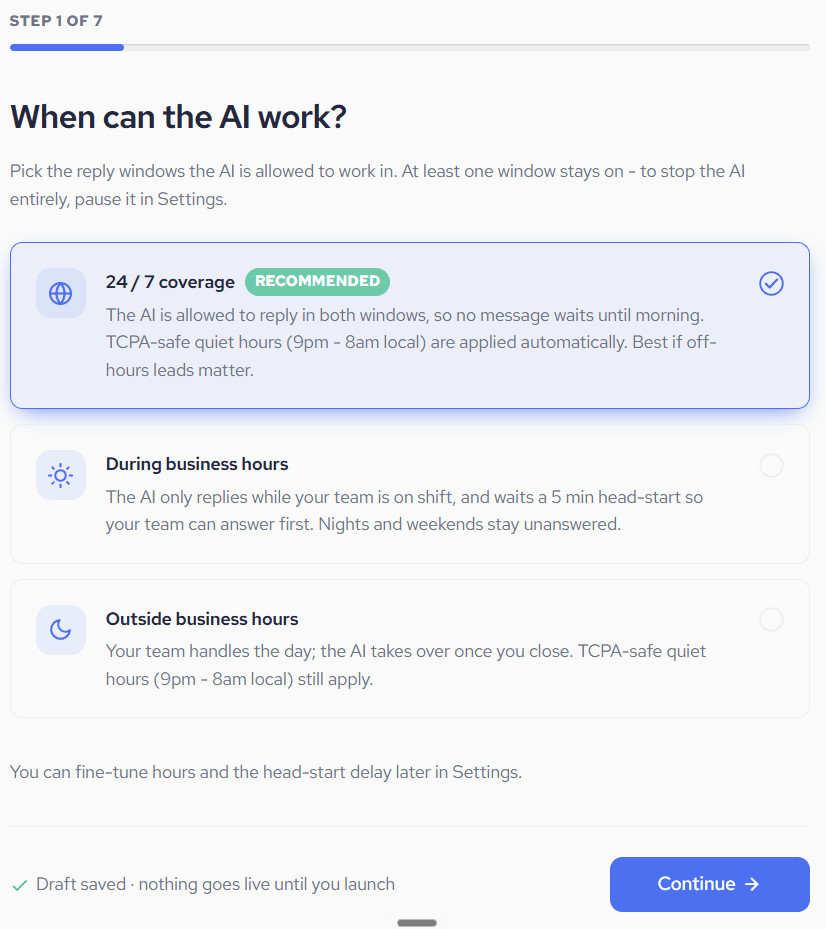
Step 1 of 7: When can the AI work?
Choose the reply windows your AI is allowed to work in:
- 24 / 7 coverage (Recommended): the AI can reply both during and outside business hours, so no message waits until morning.
- During business hours: the AI only replies while your team is on shift, and waits a 5-minute head start so your team can answer first. Nights and weekends stay unanswered.
- Outside business hours: your team handles the day; the AI takes over once you close.
Good to know:
- Quiet hours (9 PM – 8 AM in your customer’s local time) are applied automatically with every option.
- At least one window always stays on. To stop the AI entirely, set its status to Paused in Settings.
- You can fine-tune your hours and the head-start delay later in Settings → Schedule.
Step 2 of 7: How your AI earns Auto Reply
This step explains how your AI goes from drafting replies to sending them. There’s nothing to choose here. Click Continue when you’ve read it.
- Test Mode (Starts here): your AI writes replies and holds them for your approval. Nothing sends until you do.
- Auto Reply (Locked · 0/10): your AI replies to customers automatically, inside your business hours and guardrails. It unlocks after 10 clean approvals in your Inbox, meaning 10 drafts you approve without editing.
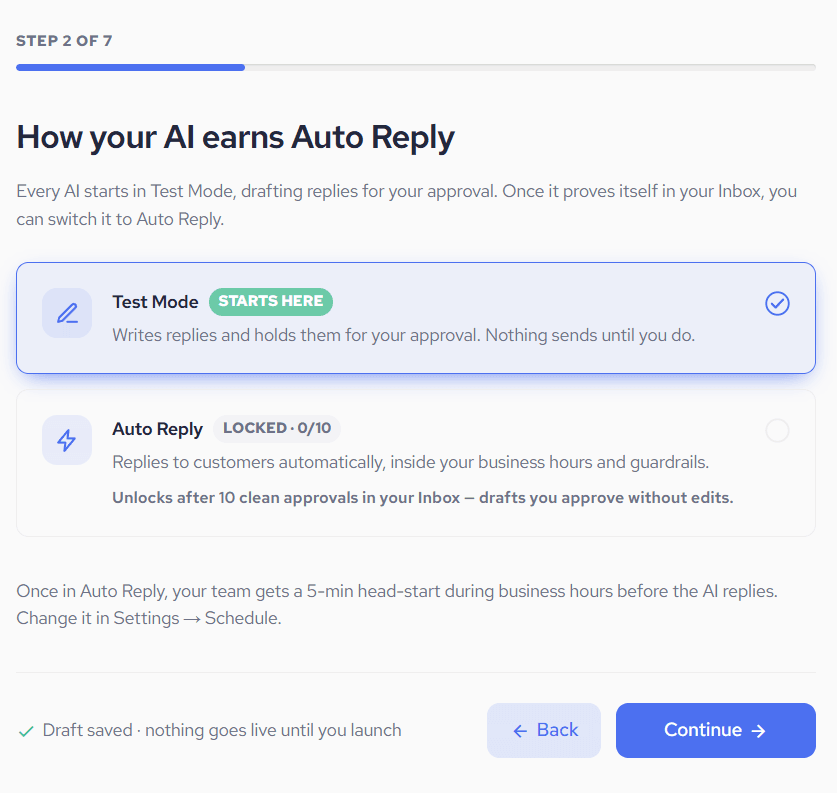
Good to know: once you’re in Auto Reply, your team still gets a 5-minute head start during business hours before the AI replies. You can change this in Settings → Schedule.
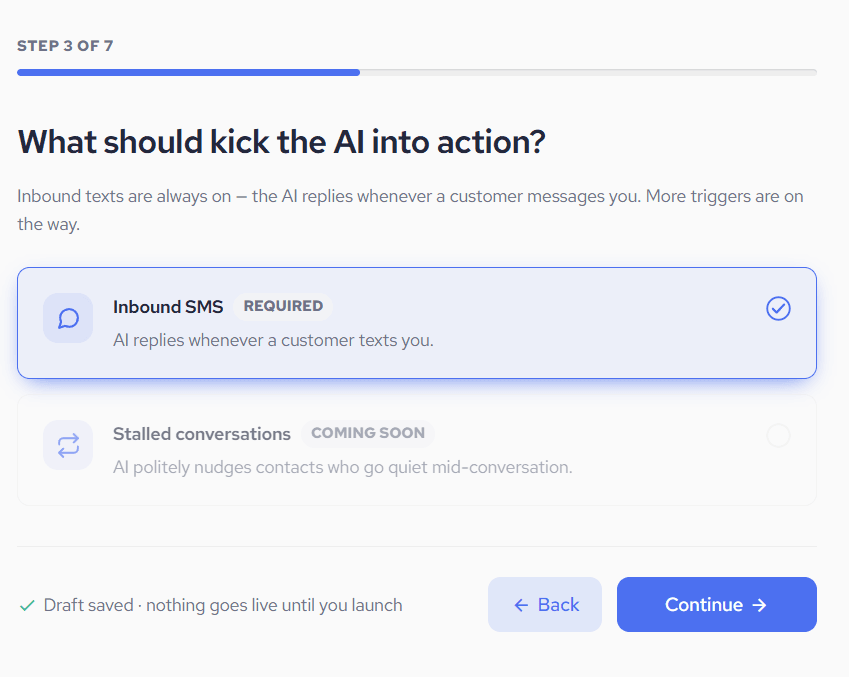
Step 3 of 7: What should kick the AI into action?
- Inbound SMS (Required): the AI replies whenever a customer texts you. This is always on and can’t be turned off.
- Stalled conversations (Coming soon): the AI will politely nudge contacts who go quiet mid-conversation. It’s shown for reference but can’t be selected yet.
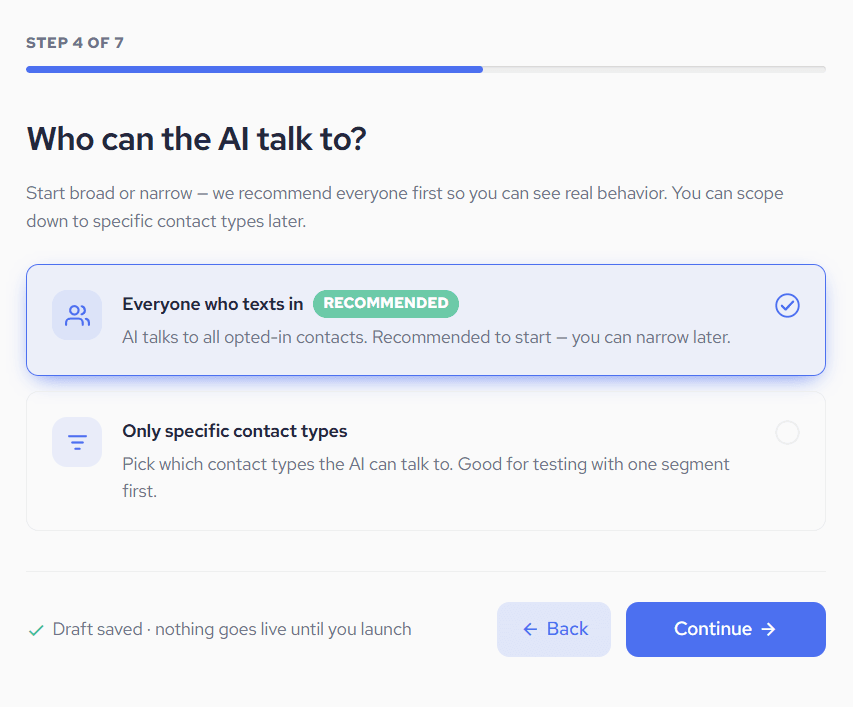
Step 4 of 7: Who can the AI talk to?
- Everyone who texts in (Recommended): the AI talks to all opted-in contacts. We recommend starting here so you can see how it behaves with real conversations.
- Only specific contact types: pick which contact types the AI can message. This is useful for testing with one group first.
If you choose Only specific contact types, select one or more of:
- Current customers: active clients with a membership or a recent visit.
- Past customers: previous clients who have since lapsed.
- Leads: prospects who haven’t booked yet.
Each type shows how many of your contacts it includes. At least one type must stay selected to continue.
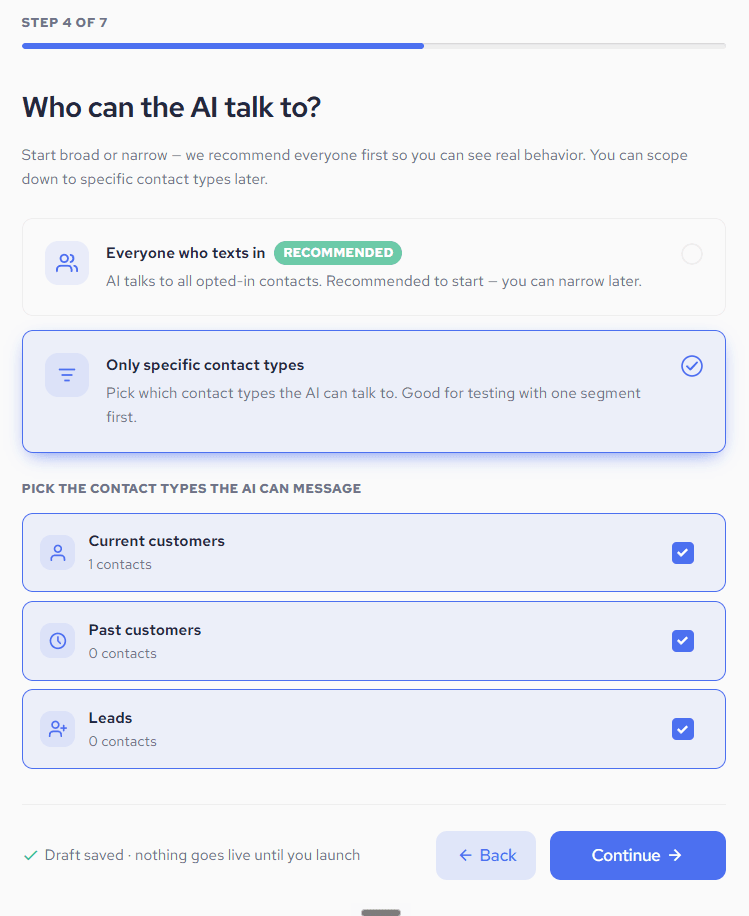
Good to know: these are the same contact types as the Target audience section in Settings, so you can change them anytime.
Step 5 of 7: Enable Call & SMS Knowledge Updates
You can let your AI learn from your real business conversations by sharing call recordings and SMS history with AI Knowledge Builder (“AIKB”). Click Open details to see exactly what this means:
- AIKB receives eligible call recordings, transcripts, and SMS history.
- It uses them to update your knowledge base, not to train base AI models.
- You can pause or delete this at any time in Settings.
“Eligible” means recordings and texts created after you turn this on, on US numbers, where your call-recording and SMS opt-in language discloses AI use.
Under How would you like to proceed?, choose one:
- Use call recordings and SMS messages to improve my AI assistant: the button changes to Agree & Continue.
- Skip this for now: continue without sharing call recordings or SMS history. Your AI will keep using your other business information only.
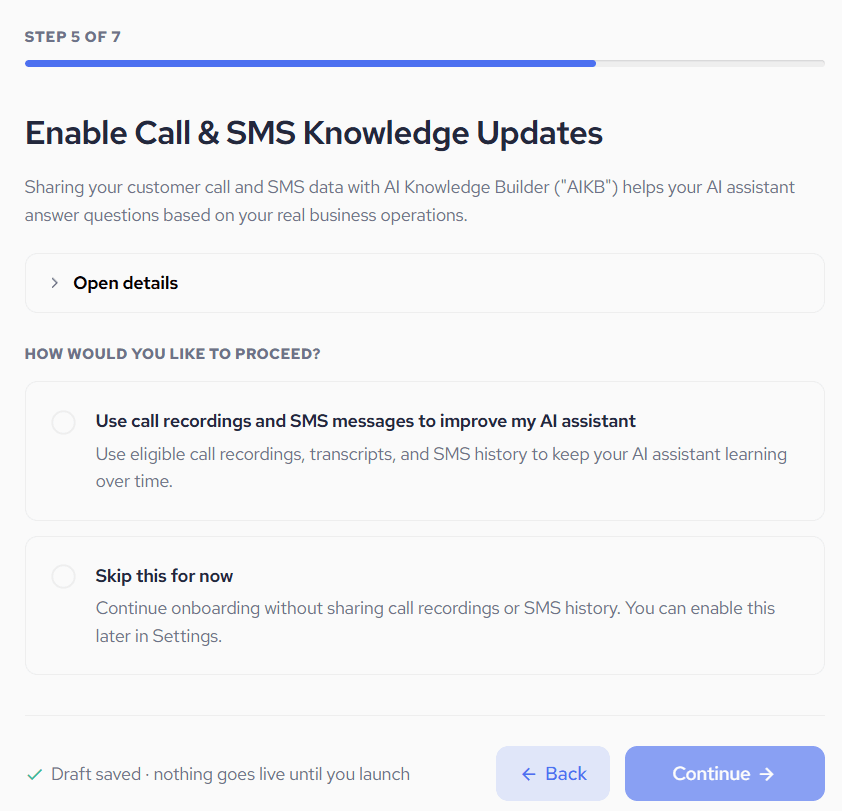
Good to know: nothing is selected for you, and skipping is always fine. You can turn this on or off later in Settings → Knowledge.
Step 6 of 7: Who should the AI alert when it gets stuck?
When the AI can’t answer a question, when a customer asks for a person, or when it detects frustration, it hands the conversation to your team. The people you add here are notified by SMS and email.
- Under Add a recipient, enter a Full name and at least a Phone or an Email.
- Click Add. The person appears in the list, with the channels they’ll be notified on.
- Repeat for anyone else who should be alerted. Click the x next to a person to remove them.
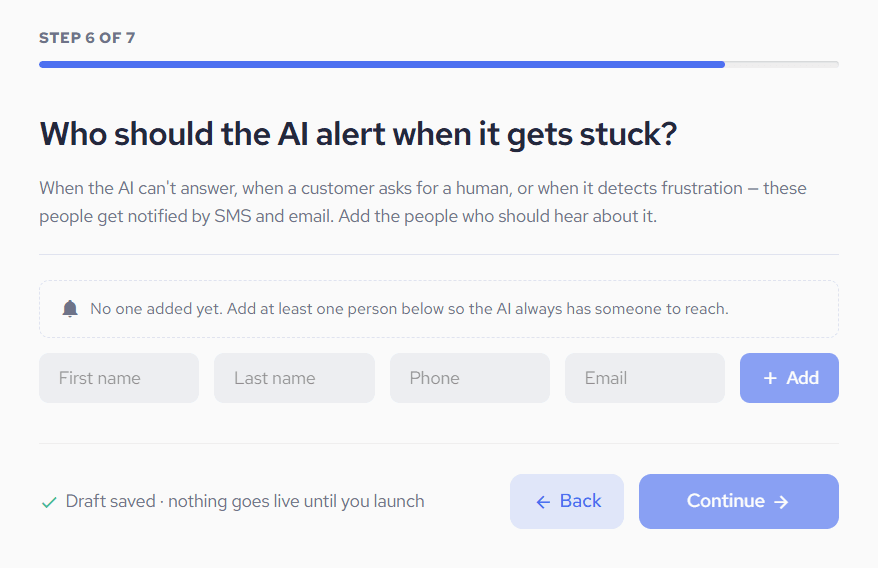
Good to know: this step is optional. If you continue without adding anyone, you’ll see “No one added yet. You can add people now or later in Settings → Escalation.” You can add recipients anytime in Settings → Escalation & alerts.
Step 7 of 7: Review and launch
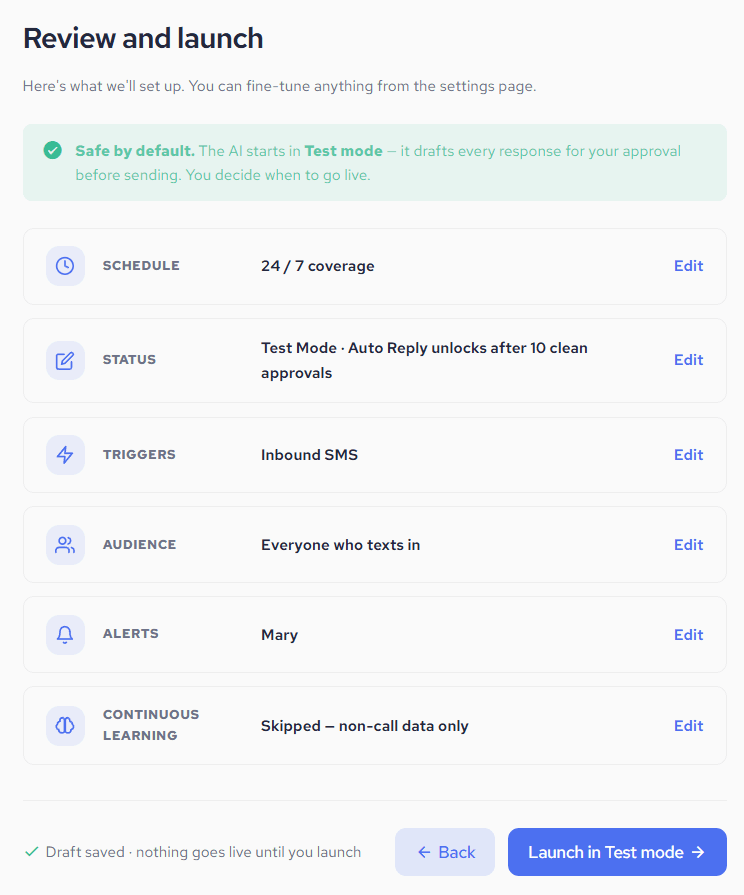
You’ll see a summary of every choice you made:
- Schedule: your chosen coverage.
- Status: Test Mode · Auto Reply unlocks after 10 clean approvals.
- Triggers: Inbound SMS.
- Audience: everyone who texts in, or the contact types you picked.
- Alerts: the people you added (or “—” if none).
- Continuous Learning: On, or Skipped.
Click Edit next to any row to jump back to that step. When everything looks right, click Launch in Test mode.
What happens after you launch
- You land on AI Assistant Settings, where you can adjust everything you set up, plus more (tone, skills, booking, compliance).
- Your AI is in Test Mode: when a customer texts in, it drafts a reply in your Inbox and waits for you to approve, edit, or discard it.
- Every draft you approve without editing counts toward the 10 clean approvals that unlock Auto Reply.
Frequently asked questions
Will the AI text my customers as soon as I finish setup?
No. Your AI always launches in Test Mode. It only drafts replies, and nothing is sent until someone on your team approves it.
I clicked “Skip for now”. How do I set up my AI?
You can configure everything directly in AI Assistant Settings. On the left-hand sidebar menu, click AI Assistant, then click the Settings (gear icon) in the top right corner.
Why is the “Let’s set Remy up” button disabled?
You need to check the terms box on the intro screen first.
Can I change my choices later?
Yes. Every setting from onboarding (schedule, audience, knowledge updates, alert recipients, and the assistant’s name) can be changed anytime in AI Assistant Settings.